2016年11月8日 星期二

The request filtering module is configured to deny a request that exceeds the request content length.


今天遇到上傳檔案問題,
上傳後直接跳 404.13 error!
error message :
The request filtering module is configured to deny a request that exceeds the request content length.


已確定在 httpRuntime 的 maxRequestLength 屬性設定上傳檔案大小的限制,
卻還是活生生的發生這個問題
<system.web>
  <httpRuntime maxRequestLength="104857600" targetFramework="4.6.1" />
</system.web>

搜尋了一下,原來還要在 system.webServer/security/requestFiltering/requestLimits 的
maxAllowedContentLength 屬性設定上傳檔案的限制,可以正常啦!
<system.webServer>
 <security>
  <requestFiltering>
   <requestLimits maxAllowedContentLength="104857600"></requestLimits>
  </requestFiltering>
 </security>
</system.webServer>


附上網友的說明:
The maxRequestLength indicates the maximum file upload size supported by ASP.NET, the maxAllowedContentLength specifies the maximum length of content in a request supported by IIS. Hence, we need to set both maxRequestLength and maxAllowedContentLength values to upload large files.

2016年10月13日 星期四

MSBuild Error MSB4094


使用 MSBuild 的 XmlPoke 更新特定 element attribute 的值,卻拋出 exception:
error MSB4094: "..." is an invalid value for the "Value" parameter of the "XmlPoke" task. Multiple items cannot be passed into a parameter of type "Microsoft.Build.Framework.ITaskItem"


研究後發現,原來是我要更新的內容包含分號 ( ; ),必須將分號跳脫成 %3B 即可

Example:

<Compile Include="MyFile.cs;MyClass.cs"/>
                          ↓↓↓↓↓
<Compile Include="MyFile.cs%3BMyClass.cs"/>


2016年9月30日 星期五

mysql workbench Error Code: 1175


在 mysql workbench 執行 SQL 發生以下錯誤:
Error Code: 1175
You are using safe update mode and you tried to update a table without a WHERE that uses a KEY column

該怎麼辦呢?

  1. 打開 mysql workbench
  2. Edit → Preferences
  3. workbench 6.0,選擇 SQL Queries 頁籤
  4. workbench 6.3,選擇 SQL Editor 頁籤
  5. 反勾選Safe Updates. Forbid UPDATEs And DELETEs with no key in WHERE clause or no LIMIT clause. Requires a reconnection
  6. workbench 重新連線
  7. 即可正常執行

2016年9月6日 星期二

Prevent Cross-Site Request Forgery (CSRF) using ASP.NET MVC’s AntiForgeryToken()

什麼是 Cross-Site Request Forgery (CSRF)

簡單來說,CSRF 就是使用者在不知情的情況,讓瀏覽器送出請求給目標網站以達攻擊目的。

使用者進行網路驗證後,瀏覽器會將驗證資訊存在 Cookie , 若使用者未登出,此 Cookie 仍視為有效, 而使用者瀏覽其他網站時,會將此驗證資訊回傳 server 以便進行操作, 此時使用者在不自覺的情況下,瀏覽含有攻擊程式碼的網頁, 駭客可使用相同一份驗證資訊(使用者身份)進行攻擊。

如何預防 CSRF

在 View 上 加入 @Html.AntiForgeryToken()
<!-- Contained in xxxxx.cshtml -->
@model MileageStats.ServicesModel.User
@Html.AntiForgeryToken()

在 client 端,即可檢視會產出 hidden input html
<!-- Rendered HTML in the client browser -->
<input name="__RequestVerificationToken" 
  type="hidden" 
  value="H4zpQFvPdmEdGCLsFgeByj0xg+BODBjIMvtSl5anoNaOfX4V69Pt1OvnjIbZuYrpgzWxWHIjbn
  zFOLxP5SzVR4cM9XZeV78IPi8K4ewkM3k2oFkplrXL4uoAqy+aoSOg8s1m1qxrE7oeBBtvezEHCAs6nKE
  h2jAwn3w0MwmhkcDQiJfJK7hGvN0jXA4d7S8x7rbLxp4Y8IJZS9wka2eOLg==" />

在 controller action 加上 ValidateAntiForgeryTokenAttribute
// Contained in xxxxController.cs
[HttpPost]
[ValidateInput(false)]
[ValidateAntiForgeryToken]
public ActionResult Edit(....)

透過 AntiForgeryToken 來檢查連線是否是正常的,
簡單的兩個步驟就完成囉!

參考:https://msdn.microsoft.com/en-us/library/hh404095.aspx

2016年9月5日 星期一

Preventing Open Redirection Attacks

前一陣子維護的 web 進行安全性掃描,
被列了一個 issue ,就是 open redirection attack,
至於什麼是  open redirection attack ,又該如何解決呢?
有興趣就接著往下看吧!


What's Open Redirection Attacks ?

Any web application that redirects to a URL that is specified via the request such as the querystring or form data can potentially be tampered with to redirect users to an external, malicious URL. This tampering is called an open redirection attack.


舉例來說,當某頁面需要登入權限,但還未登入時,當輸入網址後,會被導至登入頁,
在登入成功後,透過 returnUrl 會再導回原頁面,
如:
當我想進入 http://somewebhost/xxx/list
因為還未登入,所以被導至 http://somewebhost/Account/LogOn?returnUrl=/xxx/list
但成功登入後,則透過 returnUrl 導至 http://somewebhost/xxx/list

這一切都很完美,但對有心人士來說,也很完美,
怎麼說呢? 就是透過 returnUrl 這個特性,可以把使用者導引至惡意網站,

可以這麼做,組成以下連結,讓使用者誤以為進入正確的網站(也許是某金融網站 )
http://somewebhost/Account/LogOn?returnUrl=http://someBadWeb/doSomething

但成功登入後,卻會將使用者導至另一個惡意網站,而使用者會以為是正常的登入成功,
可能因此填入重要個資,如信用卡號碼等等,
形成一種釣魚網站的手法,十分可怕

該如何預防?

就是檢查 returnUrl 是否是合法的,也就是說只能導至目前 host 下的網址,

在 asp.net MVC3 以上的寫法,
使用 System.Web.Mvc.Url helper 類別方法 IsLocalUrl() ,
來判斷 returnUrl 是否是合法的,如下:
public ActionResult LogOn(LogOnModel model, string returnUrl)
{    
 if (Url.IsLocalUrl(returnUrl))
 {
  return Redirect(returnUrl);
 }
 else
 {
  return RedirectToAction("Index", "Home");
 }
}

若不是 MVC 專案,
則可利用以下方法進行驗證:
public static bool IsUrlLocalToHost(this HttpRequestBase request, string url)
{
   return !url.IsEmpty() &&
          ((url[0] == '/' && (url.Length == 1 ||
           (url[1] != '/' && url[1] != '\\'))) || 
           (url.Length > 1 &&
            url[0] == '~' && url[1] == '/'));
}

以上就可以解決此 issue 囉!

參考:http://www.asp.net/mvc/overview/security/preventing-open-redirection-attacks

2016年8月24日 星期三

json.net 反序列化繼承的子類別問題

今天遇到 json.net 反序列化的問題,
( json.net deserilize dirven class problem! )

前情提要:

開發 web, server 與 client 透過 json 格式傳遞資料,
server 端在定義 ViewMode 時,DataModel 可能是 ChildAModel 或 ChildBModel 類別,
以 OO多型 ( Polymorphism ) 的設計來說,
實作一個父類 ( BaseModel ) 讓 ChildAModel, ChildBModel 繼承,
這樣 ViewModel.DataModel 就可以指定 ChildAModel, ChildBModel 其中之一的資料格式
如下:
public class BaseModel
{
 public int key { get; set; }
}

public class ChildAModel: BaseModel
{
 public string Name { get; set; }
 public int Age { get; set; }
}

public class ChildBModel : BaseModel
{
 public string SomeProperty1 { get; set; }
 public int SomeProperty2 { get; set; }
}

public class ViewModel
{
 public BaseModel DataModel { get; set; }
}

問題:

依這樣的設計,
將 ViewModel 的資料轉成 JSON 拋給 Client 沒問題,
JavaScript 本身就是延展性高的語言,

但由 Client 再拋給 Server 時,
Json.Net 將 JSON 反序列成物件時,
問題來了!
ViewModel.DataModel 只會被反序列化成 BaseModel ,
其他資料全掉光了,
傷腦筋啦! 該如何是好呢?

Solution:

基本概念是靠實作 CustomCreationConverter.Create 來通知 Json.Net 反序列化 T 時,
要轉成哪一種類別,但此 Create 原生方法卻沒有提供其他資訊來判斷該用哪種類別
example:
public interface IPerson
{
    string FirstName { get; set; }
    string LastName { get; set; }
    DateTime BirthDate { get; set; }
}

public class Employee : IPerson
{
    public string FirstName { get; set; }
    public string LastName { get; set; }
    public DateTime BirthDate { get; set; }

    public string Department { get; set; }
    public string JobTitle { get; set; }
}

public class PersonConverter : CustomCreationConverter
{
    public override IPerson Create(Type objectType)
    {
        return new Employee();
    }
}

發現有善心人士也遇到此問題,並公開解法
覆寫 JsonConverter,擴充 Create 方法
如下: ( 參考 )
public abstract class JsonCreationConverter : JsonConverter
{
 protected abstract T Create(Type objectType, JObject jsonObject);

 public override bool CanConvert(Type objectType)
 {
  return typeof(T).IsAssignableFrom(objectType);
 }

 public override object ReadJson(JsonReader reader, Type objectType, 
  object existingValue, JsonSerializer serializer)
 {
  var jsonObject = JObject.Load(reader);
  var target = Create(objectType, jsonObject);
  serializer.Populate(jsonObject.CreateReader(), target);
  return target;
 }

 public override void WriteJson(JsonWriter writer, object value, 
  JsonSerializer serializer)
 {
  throw new NotImplementedException();
 }
}

再自訂 Json.Net Conveter,並依物件的 property 回覆類別,如下

public class ModelConverter : JsonCreationConverter
{
 protected override BaseModel Create(Type objectType, 
  JObject jsonObject)
 {
  if (jsonObject["Name"] != null)
  {
   return new ChildAModel();
  }
  else if (jsonObject["SomeProperty1"] != null)
  {
   return new ChildBModel();
  }
  else
  {
   return new BaseModel();
  }
 }
}

最後反序列化的使用方式,如下:

var deserializedModel = JsonConvert.DeserializeObject<BaseModel>(json,
  new ModelConverter ());

以上!

2016年8月3日 星期三

Firefox error: Unable to check input because the pattern is not a valid regexp: invalid identity escape in regular expression


在下大部分時間是用 chrome 開發網頁,
但身為網頁開發人員,
三不五時就要看看自已寫的東西在別的瀏覽器會不會有問題,
今天在 firefox 就中招了,
使用 input pattern attribute 時,
下 regular expression 習慣性會將特殊符號加上 escape ( \ ),
這樣的寫法在 chrome 是沒問題的,如下:

<input type="text" class="form-control" required
   pattern="[\-\_]"
   >

但在 firefox 卻拋出錯誤訊息:
Unable to check <input pattern='[\-\_]'> because the pattern is not a valid regexp: invalid identity escape in regular expression


研究後發現,在 input pattern 不需要做 escape ,在 chrome, firefox 都 work,
修改後,如下:
<input type="text" class="form-control" required
   pattern="[-_]"
   >


2016年7月26日 星期二

The controller for path '/Account/Login' was not found or does not implement IController.


發現一問題,
透過 .net authentication 機制,當未登入狀態,
預設應該導至哪一頁是依 <form loginUrl="..."/> 設定,

<authentication mode="Forms">
  <forms loginUrl="~/login.aspx"/>
</authentication>

但設定後卻無效
查詢發現在 web.config 的 appSettings 加上此行,即可

<add key="loginUrl" value="~/login.aspx" />

原因不明,在此做個紀綠先!

2016年6月28日 星期二

upgrade angular2 new ngForm ( RC3 )

將 angular2 升至 RC2 後,就出現了一段警告訊息:

*It looks like you're using the old forms module. This will be opt-in in the next RC, and will eventually be removed in favor of the new forms module. For more information, see: https://docs.google.com/document/u/1/d/1RIezQqE4aEhBRmArIAS1mRIZtWFf6JxN_7B4meyWK0Y/pub

看來在 RC2 後,ngForm 做了一番修正,需要做一些破壞性的處理,
以下是將舊版 ngForm 升級至新版的步驟:
(目前已升至 RC3 )

1. main.ts 加入:
import { disableDeprecatedForms, provideForms } 
    from '@angular/forms';

bootstrap(AppComponent, [disableDeprecatedForms(), provideForms() ]);

2. component 修改部分:
import {CORE_DIRECTIVES, FORM_DIRECTIVES, NgForm, Control}
    from '@angular/common';
...

@Component({ 
    directives: [FORM_DIRECTIVES]
})
修正為:
import {CORE_DIRECTIVES}    from '@angular/common';
import {REACTIVE_FORM_DIRECTIVES, FormControl, FormGroup}
    from '@angular/forms';
...
@Component({
    directives: [REACTIVE_FORM_DIRECTIVES]
})


3. form class 更名,尤其是有用 FormBuilder 做客製化驗證的部分:

REACTIVE_FORM_DIRECTIVES:
  • formGroup (deprecated: ngFormModel) 
  • formControl (deprecated: ngFormControl) 
  • formControlName (deprecated: ngControl) 
  • formGroupName (deprecated: ngControlGroup) 
  • formArrayName (deprecated: ngControlGroup) 
  • FormControl() (deprecated: Control) 
  • FormGroup() (deprecated: ControlGroup) 
  • FormArray() (deprecated: ControlArray) 
  • FormBuilder (same) 
  • Validators (same)

4. form control ( input, select...),需加上 name attribute,
#name="ngForm" 要改為 #name="ngModel":
<input type="text" class="form-control" required
                           [(ngModel)]="name"
                           ngControl="name"
                           #name="ngForm" />
修改為:
<input type="text" class="form-control" required
                           [(ngModel)]="name"
                           ngControl="name"
                           name="name"
                           #name="ngModel" />

5. ngFormModel, ngControl 修改部分 ( HTML ):
<form #templateForm="ngForm" 
          [ngFormModel]="_form" />
    <input type="text" class="form-control" required
                           [(ngModel)]="TemplateName"
                           pattern="^[a-zA-Z0-9_.\-\u4e00-\u9fa5-\(-\)\s]+$"
                           ngControl="TemplateName" />

</form>
修改為:
<form #templateForm="ngForm" 
          [formGroup]="_form" />
    <input type="text" class="form-control" required
                           name="TemplateName"
                           [(ngModel)]="TemplateName"
                           pattern="^[a-zA-Z0-9_.\-\u4e00-\u9fa5-\(-\)\s]+$"
                           formControlName="TemplateName" />

</form>

6. ngFormModel, ngControl 修改部分 ( typescript)::
_form: ControlGroup;
constructor(
        @Inject(FormBuilder) fb: FormBuilder
    ) {
        this._addTemplateForm = fb.group({
            TemplateName: ['', Validators.required]
        })
    }
修改為:
_form: FormGroup;
constructor(
        @Inject(FormBuilder) fb: FormBuilder
    ) {
        this._addTemplateForm = fb.group({
            TemplateName: ['', Validators.required]
        })
    }


升級步驟大致如上,希望可以幫助到各位囉!

2016年6月18日 星期六

Arduino - 重量感測器(電子秤)

前一陣子玩了一下 Arduino 測量重量的 sensor,也就是電子秤的原理,
電子秤的原理就是根據金屬受力以後的微弱形變來計算其受力的大小。

透過稱重專用的AD晶片 ( HX711 ) 測量出當前材料所受到拉彎扭的力,
並結合 Arduino 和對應 Library 即可。

HX711晶片:

重量感測器結構:


重量感測器結合木板:


實際操作畫面:(畫面是用較差的木板測試,後來才改用較適合的木板)

2016年6月12日 星期日

使用 jQuery 操作 XML

寫 web 多年,在實作前端 ( javascript ) 與 Server 的溝通總是以 JSON 為主,
從沒想過用 XML 格式進行溝通,
一直覺得在前端 Javascript 操作 XML 是一件痛苦的事,
原來在 jQuery 1.5 就有提供方便的方式查詢與操作 XML,

使用 $($.parseXML(xmlStr)) 轉成 jQuery 物件後,
即可像操作 dom 一樣,瀏覽 xml 囉!
範例如下:(參考官網)

var xml = "RSS Title",
  xmlDoc = $.parseXML( xml ),
  $xml = $( xmlDoc ),
  $title = $xml.find( "title" );
 
// Append "RSS Title" to #someElement
$( "#someElement" ).append( $title.text() );
 
// Change the title to "XML Title"
$title.text( "XML Title" );
 
// Append "XML Title" to #anotherElement
$( "#anotherElement" ).append( $title.text() );

2016年6月8日 星期三

unable to read data from the transport connection an existing connection was forcibly closed by remote host

今天遇到一案例,
使用 WebClient 下載檔案,
卻拋出以下錯誤訊息:
unable to read data from the transport connection an existing connection was forcibly closed by remote host

解決方式:
在建立 WebClient 前,加入此行,即可
System.Net.ServicePointManager.Expect100Continue = false;

那什麼要將 Expect100Continue 設為 false 呢?
因為 Server 跟 Client 在溝通時,中途會經過很多節點,如 proxy,
但這些節點不一定支援 Expect100Continue 進而拋出此 exception

那 Expect100Continue  又是什麼?
簡單來說是為了減少網路流量所設計的機制,原因如下:( 參考 msdn )

For example, assume the Expect100Continue property is false.When the request is sent to the server, it includes the data.If, after reading the request headers, the server requires authentication and must send a 401 response, the client must resend the data with proper authentication headers.

If this property is true, the request headers are sent to the server.If the server has not rejected the request, it sends a 100-Continue response signaling that the data can be transmitted.If, as in the preceding example, the server requires authentication, it sends the 401 response and the client has not unnecessarily transmitted the data.

2016年5月24日 星期二

Angular2 : How to update ngModel in directive


實作 angular2 directive 遇到一個問題,
當實作 datepicker directive 時,若已選擇日期,則同時更新 _Model.DataFrom 的值,
如下圖 _Model.DataFrom 是雙向繫結在 input 上


經研究後發現,步驟如下: ( 參加下圖 )

  1. 在 directive 的建構子宣告 @Self() cd: NgModel,即可拿到 NgModel 的 reference
  2. 需要更新 NgModel 的值的時候,呼叫 _ngModel.viewToModelUpdate(your new value)

就這樣打完收工囉!

2016年5月23日 星期一

fix page is empty on IIS 7.5 (windows server 2008) problem

近日陷入一困擾的案件中,
當我把 web 發佈至 IIS 上,
MVC 頁面可正常顯示,
但 aspx 頁面無法正常顯示,可是 http status 卻是 200,


在我的開發環境卻是正常的,此問題困擾了我數日,不好容易找到問題點,在此分享給各位


Server 發佈環境:

  1. windows server 2008 r2 sp1
  2. IIS 7.5
  3. .net framework 4.6.1
  4. asp.net MVC5 mix web form

開發環境:

  1. Windows 10 Home
  2. IIS 10
  3. VS2015
  4. .net framework 4.6.1
  5. asp.net MVC5 mix web form


Solution:
在抽絲剝繭後,終於發現原來是 master 在搞鬼,
使用的專案原本為 web site project,今年才升到 web application project,
升到 web application project 時,會將 @Master CodeFile 改為 CodeBehind,
從 source control 來看,當初升級時確時為 CodeBehind,
但後面上 code,卻又改回 CodeFile,但在開發環境仍是沒問題,
所以一直沒發現此問題,進而導致這怪異的現象發生,
終於找到問題點結案了!


↓↓↓ 改為 ↓↓↓


另外 CodeFile, CodeBehind 的比較,請參考這邊
簡單來說 CodeFile 是給 web site project 用的,
CodeBehind 是給 web application project 用的

2016年5月16日 星期一

Angular 2 RC1 error handling in VS2015

自從升級至 Angular2 RC1 後,
VS2015 一直提示以下錯誤訊息:
  1. Invalid module name in augmentation, module '../../Observable' cannot be found.
  2. Property 'map' does not exist on type 'Observable'


可是又 Build 得過,執行網頁也沒有問題,
但看到這一堆錯誤訊息,就覺得心浮氣躁,十分不爽快!
若改 Code 途中,真的不小心寫錯而發生錯誤,
還得在一塊 error 海中找到真正的錯誤訊息,
感到十分苦惱!

終於在 microsoft typescript github 找到相關的討論串
裡面有提到未來會修正此問題,也有 workaround,
這邊就說明一下 workaround 步驟:
  1. 下載這個檔案:typescriptServices.js
  2. 找到這個檔案:C:\Program Files (x86)\Microsoft Visual Studio 14.0\Common7\IDE\CommonExtensions\Microsoft\TypeScript\typescriptServices.js
  3. 覆蓋步驟 2 的檔案,重啟 VS2015 即可
暫時這樣的方式解決吧!

2016年5月13日 星期五

VS2015 TypeScript "Compile On Save" options is disabled!

在 Improved support for tsconfig.json in Visual Studio 2015 提到 VS2015 已支援 tsconfig.json,
但發現一個問題,在 VS2015 中,我直接對 *.ts 進行儲存,卻不會立即編譯 ts 檔,
必須要 rebuild 專案才會編譯,這也太無法讓人接受了吧!

經一番 google 才發現,原來專案加入 tsconfig.json 後,預設是關閉 compile on save 的,
那該如何設定才能開啟呢?

  1. 找到 VS2015 Tools\Options\Text Editor\TypeScript\Project 頁面
  2. 勾選 "Automatically compile typescript files which are not part of a project"
  3. 重啟 VS2015


2016年5月12日 星期四

Improved support for tsconfig.json in Visual Studio 2015

原來 typescript 1.8 已改善 Visual Studio 2015 支援 tsconfig.json,
在編譯 *.ts 檔時,依 tsconfig.json 的參數進行 ( release note )
( includes ASP.NET v4 projects )

在未支援前,還要直接修改專案檔,如下:

現在只要在專案加入 tsconfig.json ,依需求設定參數即可
{
  "compilerOptions": {
    "target": "es5",
    "module": "commonjs",
    "moduleResolution": "node",
    "sourceMap": true,
    "emitDecoratorMetadata": true,
    "experimentalDecorators": true,
    "removeComments": false,
    "noImplicitAny": false
  },
  "exclude": [
    "node_modules",
    "typings/main",
    "typings/main.d.ts"
  ]
}


在專案檔 typescript 參數設定頁面就會被設為不可編輯,如下:


這樣真的就方便多了,不用再煩惱啦!

2016年5月9日 星期一

upgrade angular 2 to RC1 solution ( from beta.17 )

在 2016/05/02 angular2 就已發佈至 RC 0
緊接著在 2016/05/02 又發佈了 RC1 
升級的過程一直不順利,
看來無法跟之前一樣,package 版本的數字改一改就好,
要乖乖看文件了!

終於把問題解決了,大致要處理的部分如下:
  • package module rename
  • typescript typing
  • systemjs.config.js
package module rename
先來看看 change log,在 RC0 做了重大變更,
node_module 資料夾下,angular2 資料夾換成 @angular 當然底下的路徑都換了,
所以要將以下 package 路徑做替換,
詳情如下:
To import various symbols please adjust the paths in the following way:
  • angular2/core -> @angular/core
  • angular2/compiler -> @angular/compiler
  • angular2/common -> @angular/common
  • angular2/platform/browser -> @angular/platform-browser (applications with precompiled templates) + @angular/platform-browser-dynamic (applications that compile templates on the fly)
  • angular2/platform/server -> @angular/platform-server
  • angular2/testing -> @angular/core/testing (it/describe/..) + @angular/compiler/testing (TestComponentBuilder) + @angular/platform-browser/testing
  • angular2/upgrade -> @angular/upgrade
  • angular2/http -> @angular/http
  • angular2/router -> @angular/router-deprecated (snapshot of the component router from beta.17 for backwards compatibility)
  • new package: @angular/router - component router with several breaking changes

typescript typing
接著設定 typescript typing ( 參考 ):
在專案根目錄新增 typings.json 檔案,內容:
{
  "ambientDependencies": {
    "es6-shim": "registry:dt/es6-shim#0.31.2+20160317120654",
    "jasmine": "registry:dt/jasmine#2.2.0+20160412134438"
  }
}

設定 package.json

在 Visual Studio 2015 對 package.json 儲存後,
即會在專案根目錄下,建立 typeings 資料夾,


在 root componment 加入 typings/browser/ambient/es6-shim/index.d.ts reference

systemjs.config.js (參考)

html 頁面使用方式,
<!-- 1. Load libraries -->
<script src="~/node_modules/es6-shim/es6-shim.min.js"></script>
<script src="~/node_modules/zone.js/dist/zone.js"></script>
<script src="~/node_modules/reflect-metadata/Reflect.js"></script>
<script src="~/node_modules/systemjs/dist/system.src.js"></script>

<script type="text/javascript">
    window.filterSystemConfig = function (config) {
        config.baseURL = '@Url.Content("~/")';
    }
</script>

<!-- 2. Configure SystemJS -->
<script src="~/systemjs.config.js"></script>
<script type="text/javascript">
    System.import('PublishScenario')
        .catch(function (err) { console.error(err); });
</script>

其中指定 config.baseURL  為 網站的根目錄
<script type="text/javascript">
    window.filterSystemConfig = function (config) {
        config.baseURL = '@Url.Content("~/")';
    }
</script>

systemjs.config.js 的內容如下:
(function (global) {

    // map tells the System loader where to look for things
    var map = {
        'PublishScenario': 'Scripts/angular-app/PublishScenario', // 'dist',
        'rxjs': 'node_modules/rxjs',
        'angular2-in-memory-web-api': 'node_modules/angular2-in-memory-web-api',
        '@angular': 'node_modules/@angular',
        'ng2-bs3-modal': 'node_modules/ng2-bs3-modal'
    };

    // packages tells the System loader how to load when no filename
    // and/or no extension
    var packages = {
        'PublishScenario': {
           
            main: 'main.js',
            defaultExtension: 'js'
        },
        'rxjs': { defaultExtension: 'js' },
        'ng2-bs3-modal': { main: 'ng2-bs3-modal.js', defaultExtension: 'js' },
        'angular2-in-memory-web-api': { defaultExtension: 'js' },
    };

    var packageNames = [
      '@angular/common',
      '@angular/compiler',
      '@angular/core',
      '@angular/http',
      '@angular/platform-browser',
      '@angular/platform-browser-dynamic',
      '@angular/router',
      '@angular/router-deprecated',
      '@angular/testing',
      '@angular/upgrade',
    ];

    // add package entries for angular packages in the form 
    // '@angular/common': { main: 'index.js', defaultExtension: 'js' }
    packageNames.forEach(function (pkgName) {
        packages[pkgName] = { main: 'index.js', defaultExtension: 'js' };
    });

    var config = {
        map: map,
        packages: packages
    }

    // filterSystemConfig - index.html's chance to modify 
    // config before we register it.
    if (global.filterSystemConfig) { global.filterSystemConfig(config); }

    System.config(config);

})(this);

以上是查看官方文件後,進行的設定,若仍有問題,就到官網去看看吧!

2016年4月29日 星期五

Angular 2.0.0-beta.17 breaking changes

Angular 2 更該至 beta.17 後,發生 warning:
Template parse warnings:
"#" inside of expressions is deprecated. Use "Let" instead! ....

似乎有做小改版,趕緊來看看 release note ,內容如下:

Before:
  • Outside of ngFor, a #... meant a reference.
  • Inside of ngFor, it meant a local variable.
This was pattern was confusing.

After:
  • <template #abc> now defines a reference to a TemplateRef, instead of an input variable used inside of the template.
  • Inside of structural directives that declare local variables, such as *ngFor, usage of #... is deprecated. Use let instead.
    • <div *ngFor="#item of items"> now becomes <div *ngFor="let item of items">
  • var-... is deprecated.
    • use # or a ref- outside of *ngFor
    • for ngFor, use the syntax: <template ngFor let-... [ngForOf]="...">

簡單說 # 的用法會讓人混淆,
搭配 ngFor 使用,是定義迴圈內的私有變數,
但放在 dom element attribute 位置時,指的又是此 dom element 的參考,

為避免混淆,所以 ngFor 改用 let 宣告私有變數,
就是這麼一回事,
了解前因後果後,
就不會想要翻桌,
狂罵改個屁呀!

Angular 2.0.0-beta.17 install Error: Invalid module name in augmentation, module '../../Observable' cannot be found.

今天發現 angular 2 已可更新至 beta.17,
抓緊時間從 beta.15 更新至 beta.17,
官方建議 ( 2016/04/29 ) 的 packages 如下:
"angular2": "2.0.0-beta.17",
"systemjs": "0.19.26",
"es6-shim": "^0.35.0",
"reflect-metadata": "0.1.2",
"rxjs": "5.0.0-beta.6",
"zone.js": "0.6.12"

還是發生問題了,錯誤訊息如下:
Invalid module name in augmentation, module '../../Observable' cannot be found.

google 大神跟我說,問題點在 rxjs,
將 rxjs 版本改回 5.0.0-beta.2 即可,
所以我用的 packages 如下:
"angular2": "2.0.0-beta.17",
"systemjs": "0.19.26",
"es6-shim": "^0.35.0",
"reflect-metadata": "0.1.2",
"rxjs": "5.0.0-beta.2",
"zone.js": "0.6.12"

這樣問題就解決囉!


2016年4月20日 星期三

Angular 2.0.0-beta.15 install Error: npm ERR! cb() never called!


這星期開工,發現 angular2 又進版至 beta.15
帶著興奮的心情,打開 packag.json 檔,進行更新,
卻事與願違,發生了 error,這就是人生呀!!
npm ERR! cb() never called!

還是必須請出 google 大神,看看該如何解決,
終於發現網友熱心的分享,
只要將 node js 更新至 v5.10.1 版即可!

測試後,已正常安裝 Angular 2.0.0-beta.15

2016年4月13日 星期三

fix Angular2 error- this.http.post(...).map(...).catch is not a function in [null]


今天嘗試在 angular2 透過 http 物件,呼叫 web service 拿資料,
卻發生 this.http.post(...).map(...).catch is not a function in [null]  error


solution:
import 這個即可:
import 'rxjs/add/operator/map'

如果覺得麻煩,就整包 import 吧!
import 'rxjs/Rx';

2016年4月6日 星期三

Angular2 beta.13 Error: More tasks executed then were scheduled


今天開始要用 angular2 實作功能,
先升級 Angular2 至最新版 beta.13 ,

但在我建置好 angular2 的環境後,
卻一直拋出 More tasks executed then were scheduled exception,


東追西找後,主要是因為我在同一頁面有做 jquery ui autocomplete 的處理導致,
把這部分的程式 mark 掉即可,
這就怪了! 這關 angular 2 什麼事!?
在請出 google 大神後,發現原來是 beta13 有問題,

網友提供一個暫時的解決方式:
找到這個檔案: node_modules\angular2\bundles\angular2-polyfills.js file
註解第 398 行:throw new Error('More tasks executed then were scheduled.');


先這樣暫時撐著用吧!
希望下一版能解決此問題囉!


[更新]
2.0.0-beta.15 已修正此問題

2016年3月29日 星期二

Windows IoT Core - Light Sensor sample


這篇介紹在 Windows IoT Core 下, Raspberry Pi 3 如何接收光敏電阻的訊號!

而光敏電阻的訊號是類比訊號,
由於 Raspberry Pi 3 沒有接收類比訊號的 pin 腳,
所以必須先將類比訊號轉成數位訊號,
那該如何做?

 ADC0832 模組,它可以將類比訊號轉為數位訊號,
而在 Windows IoT Core 類別庫,也有相對應的函式庫支援,
所以使用這個模組是十分方便的,

流程簡單來說,就是 Raspberry Pi 連接 ADC0832,ADC0832 連接 Light Sensor

Raspberry Pi ←→ ADC0832 ←→ Light Sensor

先來看看 ADC0832,共 8 個腳位


腳位說明:
Pin Number Description
1 CS - Chip Select (Active Low)
2 CH0 - Analog Input Channel 0
3 CH1 - Analog Input Channel 1
4 GND - Ground
5 DI - Data Input
6 DO - Data Output
7 CLK - Clock
8 Vcc - Positive Supply


ADC0832 connect Light Sensor:
  • Signal ( OUT ) → CH0
  • VCC → VCC
  • GND → GND


ADC0832 connect Raspberry Pi 3:
  • CS → GPIO 18
  • GND → GND
  • DO → GPIO 24
  • DI → GPIO 24 (or just connect DO and DI together)
  • CLK → GPIO 23
  • VCC → 3.3V

電路圖:

Windows IoT Core Library:
  1. 建立 AdcProviderManager 物件
  2. 建立 ADC0832 物件,並指定 ChipSelectPin, ClockPin, DataPin 腳位,
    再加入 AdcProviderManager
  3. 透過 adcManager.GetControllersAsync 取得  adcControllers 物件
  4. 建立 AnalogSensor 物件,同時設定更新頻率
  5. 透過 AnalogSensor ReadingChanged 事件,即可取得訊號( Value, Ratio ),
    由於 ADC0832 是將類比訊號轉為 8bit 數位訊號,所以:
    1. Value  為 0 ~ 255
    2. Ratio 為比例

// Create ADC manager
var adcManager = new AdcProviderManager();

// Add ADC chips
adcManager.Providers.Add(
 new ADC0832()
 {
  ChipSelectPin = gpioController.OpenPin(18),
  ClockPin = gpioController.OpenPin(23),
  DataPin = gpioController.OpenPin(24),
 }
);

// Get the well-known controller collection back
var adcControllers = await adcManager.GetControllersAsync();

// Create light sensor
var lightSensor1 = new AnalogSensor()
{
 AdcChannel = adcControllers[0].OpenChannel(0),
 ReportInterval = 250,
};

// Subscribe to events
lightSensor1.ReadingChanged += LightSensor1_ReadingChanged;

AnalogSensor ReadingChanged event:
private async void LightSensor1_ReadingChanged(IAnalogSensor sender,
 AnalogSensorReadingChangedEventArgs args)
{
 // Invert
 var ratio = 1 - args.Reading.Ratio;
 var value = args.Reading.Value;
 // Update UI
 await Dispatcher.RunIdleAsync((s) =>
 {
  // do something

 });
}

AnalogSensorReading 定義:
public sealed class AnalogSensorReading : IAnalogSensorReadingClass
{
 public AnalogSensorReading(int val, double ratio);

 public double Ratio { get; }
 public double Value { get; }
}


DEMO:


Upgrading NPM in Visual Studio 2015


之前寫過一篇文章 msbuild copy files - Illegal characters in path error
處理 npm 包裝的 package 資料夾結構太深,導致 msbuild 無法複製檔案的問題,
在 npm 3.* 版後,已處理此問題,

可是即使我安裝了新版的 nodejs ,
VS2015 還是使用舊的 npm 版本,
到底該如何處理呢? 接著看下去

在 VS2015 升級 NPM 步驟:
  1. 下載新版的 nodejs stable 版
  2. 在 VS2015, Tools / Options / Projects and Solutions / External Web Tools,
    加入 nodejs 安裝路徑並置頂,如: C:\Program Files\nodejs

  3. 重啟 VS2015,就完工囉!

2016年3月26日 星期六

Windows IoT Core & Raspberry Pi 3 - Blinky sample


學習要一步一步來,先來學習如何閃爍 LED 燈吧!
從微軟官網的範例來學習吧!  參考


需要的器材有:
  1. LED 燈泡 * 1
  2. 10 Ω 電阻 * 1
  3. 電線 * 2
  4. 麵包板 * 1

電路圖:

Windows IoT Core 控制 GPIO pin 腳位高低電底

  1. 透過 GpioController.GetDefault() 取得 GPIO Controller
  2. 取得 pin 物件,使用 GpioController.OpenPin()
  3. 設定腳位的高低電壓,透過 GpioPin.Write()
  4. 設定 pin 腳為輸出電壓腳位,使用 GpioPin.SetDriveMode()

發佈 AP 至 Raspberry Pi 3
  1. architecture:ARM
  2. 發佈對象選擇:Remote Machine
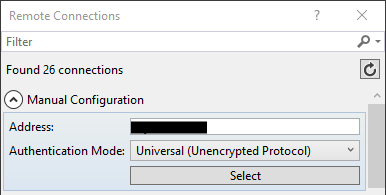
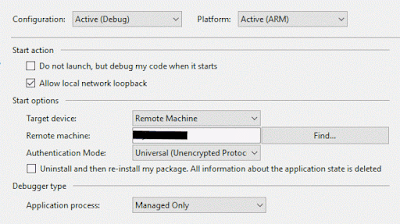
  3. 設定 Remote connection,設定 Raspberry Pi IP
  4. 亦可在 project property winows,進行設定

即可在 Raspberry Pi 看到 UWP 畫面囉!

DEMO:

2016年3月21日 星期一

Error - unable to convert runtime connection string to its design-time equivalent mysql

最近將 web site project  升級至  web application project,
開發環境從 VS2012 升級至 VS2015,

發現在更新 entity framework 的 edmx 檔的物件時發生錯誤:

執行「update model from database」


錯誤訊息: 

unable to convert runtime connection string to its design-time equivalent..


solution:
更新 the visual studio plugin 即可
請至此下載:http://dev.mysql.com/downloads/windows/visualstudio/


安裝完畢後,重啟 VS2015 即可正常更新 entity object


2016年3月20日 星期日

Raspberry Pi 7" Touchscreen Display - 開箱

為了方便開發及測試,決定入手 Raspberry Pi 官方出的觸控螢幕,
所以在露天拍賣訂了一個,等了幾天終於到貨囉!

外盒包裝:

內部零件:

物件清單:

  1. 7吋觸控螢幕 x1 
  2. 顯示驅動板x1 
  3. 支座與螺釘各 x4 
  4. 跳線 x4 
  5. 螢幕排線 x1
產品規格:
  1. 顯示尺寸:7寸
  2. 解析度:800x480
  3. 螢幕體積大小:194mm x 110mm x 20mm
  4. 螢幕可視區域:155mm x 86mm
  5. 觸控螢幕:FT5406 10指觸控電容式
  6. 重量:277g. 功耗:2.23W
安裝步驟: ( 參考 )
  1. check list
  2. connect the display ribbon cable to the back of the adapter board
  3. Lie the adapter board onto the back of the display then connect the touch screen ribbon cable into J4
  4. Attach the 4 x Standoffs & screw them though the adapter board into the back of the display
  5. Attach the DSI ribbon cable to the Adapter Board
  6. Use the 4 x screws to secure the Raspberry Pi board to the Standoffs then connect the DSI ribbon cable to the Raspberry Pi
  7. Connect the jumper wires form the Raspberry Pi to the  adapter board
  8. Power the display and Raspberry Pi Board
這樣就完工囉!

完工背面圖如下:( 下面的壓克力板是賣家提供的,不過太短導致電源線不易插入,
所以中間再接一個 L 架讓它延長一些,方便放置電源線 )


完工正面圖: ( 在 Windows IoT Core 觸控功能仍是正常運作 )


當然 Raspbian OS 也沒問題!


2016年3月17日 星期四

Fix found conflicts between different versions of the same dependent assembly warning


在 Build 專案時,
發生 found conflicts  between different versions of the same dependent assembly warning,
可是又不知道到底哪裡發生衝突,該如何是好呢?


請出 google 大神後,發現一個好用的工具 AsmSpy點此下載
用法很簡單:
AsmSpy D:\...\your project\bin

產出畫面如下:


由上圖可得知  ICSharpCode.SharpZipLib 發生衝突
NPOI.DDF 用的是 v 0.85.5.452 ,
其他專案用的是 v 0.86.0.518,

此工具可以很方便的判斷衝突的發生點,再進行處理囉!